 | - | The whole scope with most of the equipment installed. |
 | - | Close-up of the Argo Avis and Servocat hand control on the catstalk. |
 | - | This shows the cables to the servocat control box on the front of the rocker box. |
 | - | This shows the cables to the altitude motor and catstalk. |
 | - | This shows the cables to the azimuth encoder, power rail, azimuth motor, altitude motor, servocat controller, and catstalk inside the rocker box. |
 | - | This shows the powered ground board below the rocker box. |
 | - | This shows the powered truss tube blocks (power for the dew heater controller on the upper cage)and the altitude encoder. Note - The altitude encoder arm was moved to the other side of the catstalk later to prevent the truss tube knob from hitting it when the telescope is tilted toward the horizon. |
 | - | This shows the contact inside the powered truss tube block. |
 | - | This shows the power connections on the upper cage. |
 | - | This shows my new secondary mirror cover that replaces an old tube sock! |
 | - | This shows 1/4" I.D. plastic tubing installed over the mirror hold down bolts to prevent further scratches on the mirror. |
 | - | The two brass colored objects on either side of the mirror show the location of the adjustable bolts for the new wire mirror sling. |
 | - | This shows a channel made from velcro on the side of the mirror for holding the new wire mirror sling in position. |
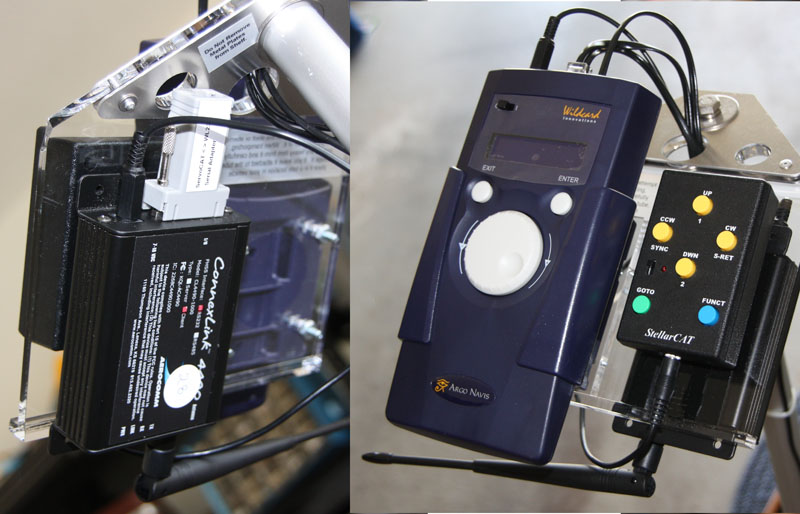 | - | This shows top and bottom views of the PC wireless transmitter/receiver. |
 | - | This shows the power feed inside the mirror box to the powered truss tube blocks. |
 | - | This shows the back of the scope with another view of the mirror sling adjustment bolts, the Astrosystems fan batteries and on/off button and charging jack, and mirror temperature sensor. |
 | - | This shows the completed scope ready for testing! |
 | - | A picture of me and the completed scope. |